Continuing on the same theme, we watched the wonderful film, The Snowman.

This is such a sweet film. Both kids love it.
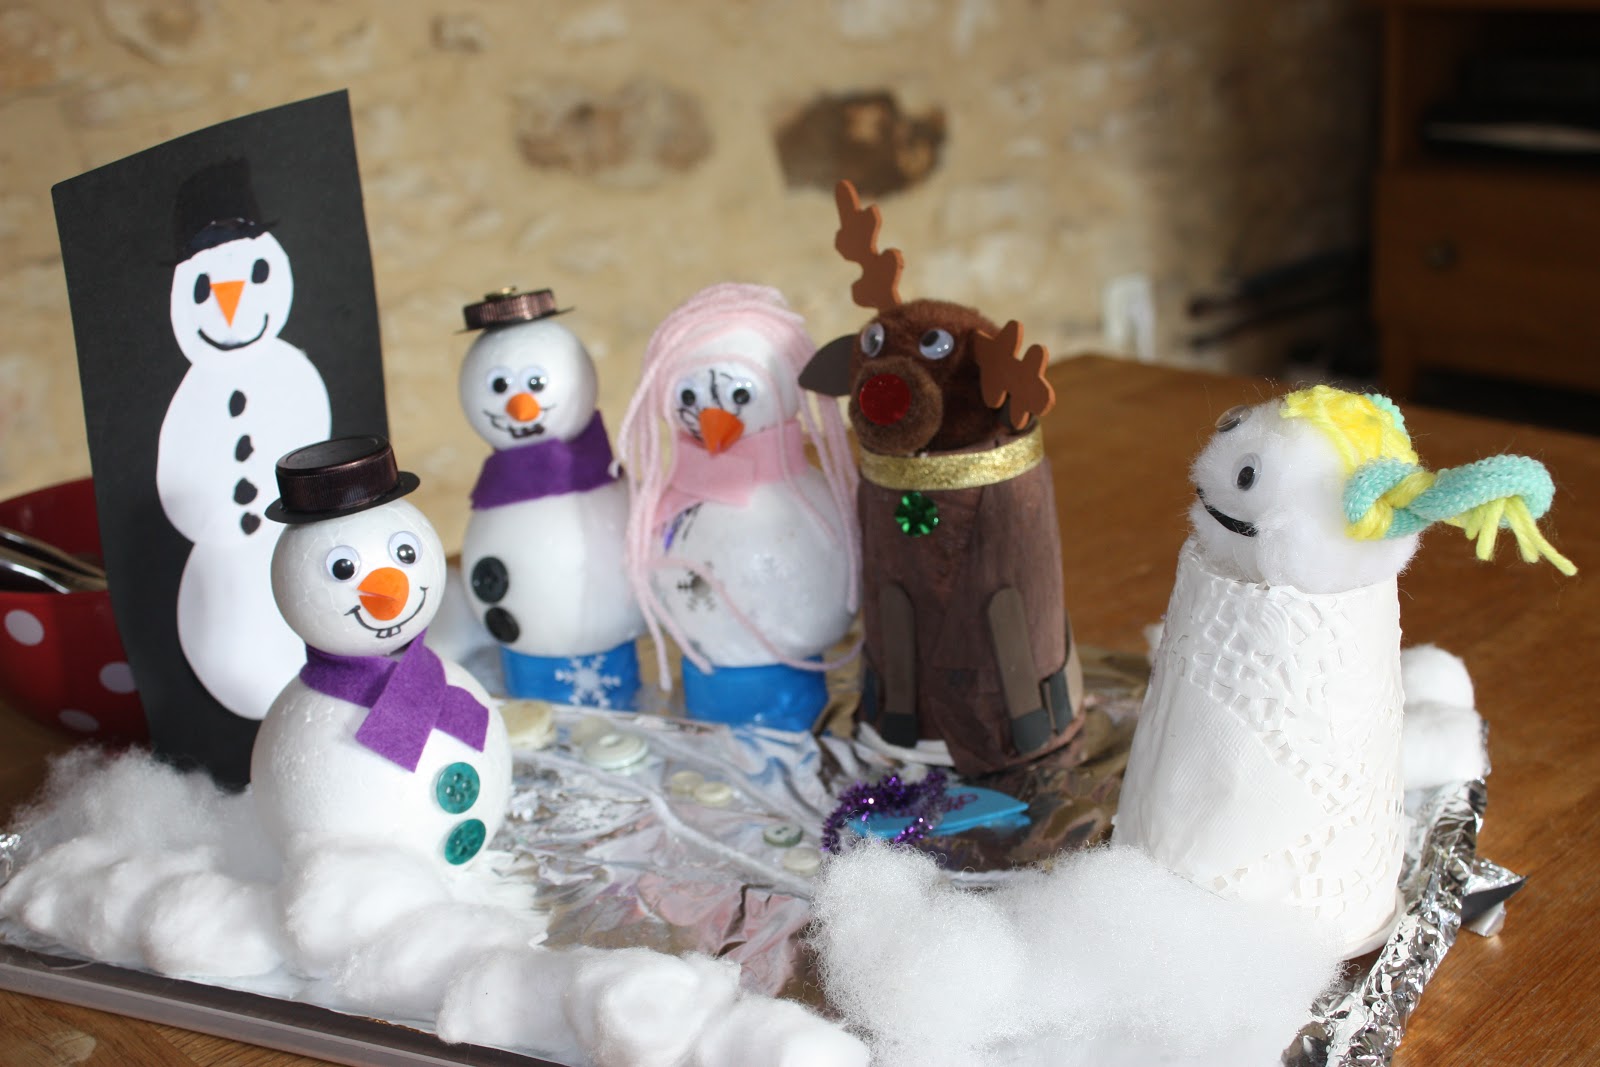
And finally, we did some crafting... I've had these polysterene balls for over a year now, waiting for me to get organised and start this project. So I decided to give up some of my precious stash in the name of keeping the kids busy during a snowday. And this is what we made:

We had a great time making these. This is what you'll need if you want to have a go:


First of all, push a toothpick into a large polystyrene ball and join with a small polystyrene ball on top. You may want to put some PVA glue in between the body and head to secure more tightly, however, it can also be fun to be able to turn the head.


You may then wish to make a horizontal 'chop' across the bottom of the snowman so that it stands straight and doesn't wobble. It's also much easier when trying to work on it. We initially tried placing it in an egg cup but it still wobbled a lot.

Then glue on some googly eyes and draw a mouth.


Next, cut a small length of felt, wrap around the snowman's neck and glue in place.


You may then want to add some hair (lengths of wool) as A did. And maybe add a few sparkly snow flakes.


Make a hat using a bottle cap and a circle of black card - glue the two together. We drew black marker all over our bottle cap to make it black. You could also paint it with a mix of PVA glue & black paint.

All that's left is the nose! I couldn't for the life of me work out how to make a cone for the nose... I googled it and did this. Glue a couple of buttons on the front et voilà, your snowman is finished!

We then made a snow scene using a baking tray which we covered in tin foil, added some cotton wool, some 'bottle cap seats' for the snow people, some white wool to make a path and a few extra snow friends from our Christmas crafting.

Adorable!
ReplyDelete